Creating a Web Dynpro Component
...
1. Start ABAP Workbench (SE80) and select Web-Dynpro-Comp./Intf. from the available object list.

2. To create a new Web Dynpro component, enter the name ZZ_00_SFLIGHT
for the new component in the selection dialog of the object list, and select Display

.
3. In the dialog box that appears, you can enter a description of the new object and selectas typeWeb Dynpro Component. In this dialog you also have the chance to maintain the name of the default window.

Assign the component ZZ_00_SFLIGHT to package $TMP.

As a result, you can now see the newly created Web Dynpro component
ZZ_00_SFLIGHT object tree, which contains the objects component controller,
component interface (which contains the entries interface controller and interface
views) and windows. You can access the objects using double-click.

Creating a new View and Assigningthe View to the Window
...
1. Click on the Web Dynpro component ZZ_00_SFLIGHT in the object tree and open the context menu to create a new view.

2. Create a view MAINVIEW.

TheView Editor will be started on the right side of the Workbench window. In order to open the Layout tab and the View Designer, a popup appears asking for user and password for the SAP Web Application Server. Use the same user/password which you used for logon to the SAP system.

3. Save the view MAINVIEW.

After saving the view MAINVIEW, it appears in the object tree of the Web Dynpro component under entry Views
.

4. Now open window ZZ_00_SFLIGHT by clicking on Windows and double-clicking on ZZ_00_SFLIGHT. Switch to change mode.

5. Now open the view structure and move the view MAINVIEW inside the window structure on the right hand side by Drag and Drop.

Open the window structure on the right hand side and you will see the embedded MAINVIEW.

6. Save your changes.
Creating a View Context for MAINVIEW Select view MAI NVIEW and switch to tab Context. Create a node in the View Controller by opening the context menu
1. Open the View Editor for view MAINVIEW and switch to tab Context. Create a context node SFLIGHT_NODE in the View Contro ller by opening the corresponding context menu.

Maintain the properties according to the screen shot below. Select SFLIGHT as
Dictionary Structure and “0...n” for the Cardinality
.
Select button Add Attribute from Structure and select all components of structure
SFLIGHT.


Press OK
The result should look like this:
The result should look like this:
.
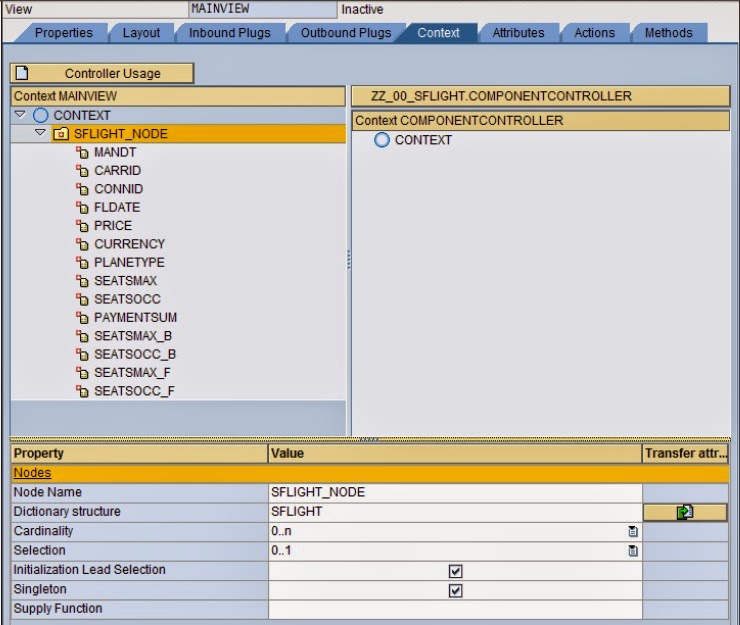
You have now created a context node SFLIGHT_NODE which refers to the data
structure of table SFLIGHT and which can contain 0 to n entries at runtime. The context node has been created in the view context, since no data exchange with other views is planned. Therefore, the component controller context usage is not necessary.
2. Save your changes of view MAINVIEW.
Creating a corresponding UI Element for the context node
SFLIGHT_NODE
...
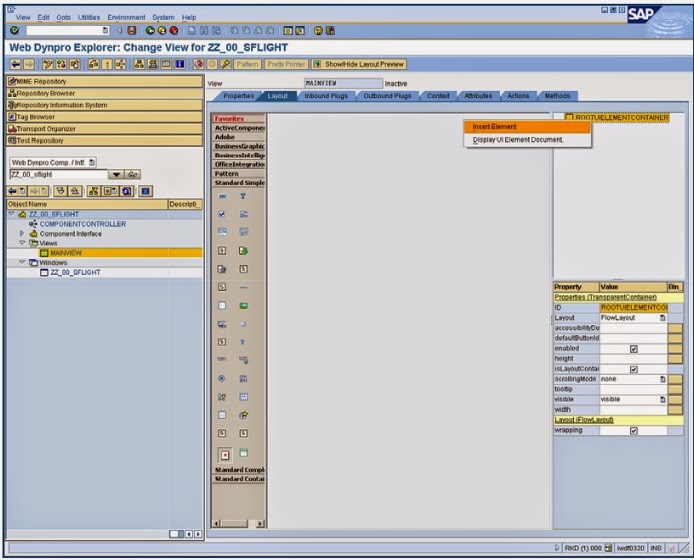
1. Switch to tab Layout of view MAINVIEW.
2. Insert a new UI element of type table under ROOTUIELEMENTCONTAINER and assign the properties in the given table.

The name of the table is SFLIGHT_TABLE.
3. Create the binding of SFLIGHT_TABLE with context node SFLIGHT_NODE, selectText View as Standard Cell Editors and activate bindings for all cells.


Select context node SFLIGHT_NODE and press Continue.
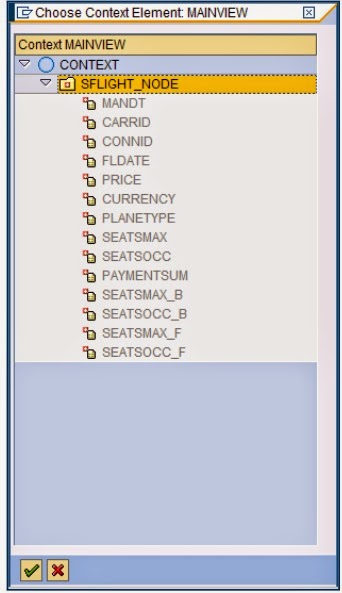
Make sure that the binding for all context attributes is enabled (all checkboxes are
activated) and press Confirm Entry (Enter).

The result should look like this:

4. Modify the property text of UI element Caption_1 to value Flights.

5. Save your changes.
Supply data from Table SFLIGHT at runtime
1. Switch to tab Methods of view MAINVIEW and double-click method
WDDOINIT. Enter the given coding.


2. Save your changes.
Creating a Web Dynpro Application
...
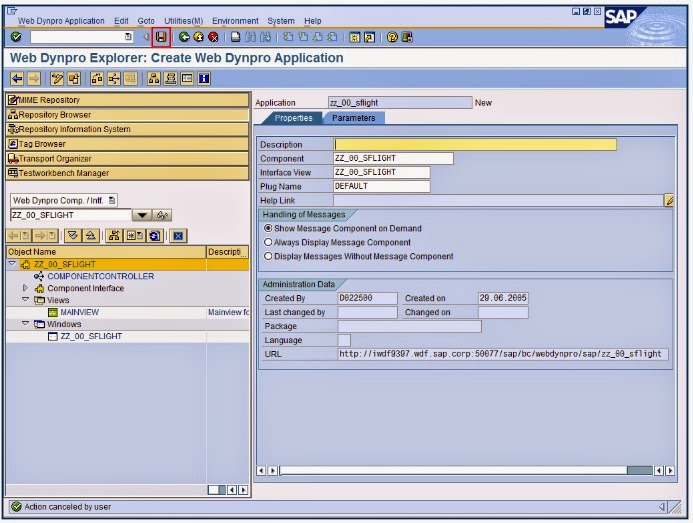
1. Click on the Web Dynpro component ZZ_00_SFLIGHT in the object tree and open the context menu to create a new application.

2. Enter a name (or accept the proposed name) and press Continue (Enter)
.
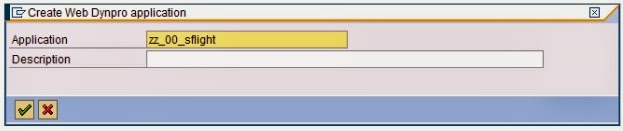
3. Save as local object.
Activating and running your Application
...
1. Activate all objects
2. Select all relevant objects and press Continue (Enter).

3. To start the application, right click on your Web Dynpro application entry and select context menu entry Test.
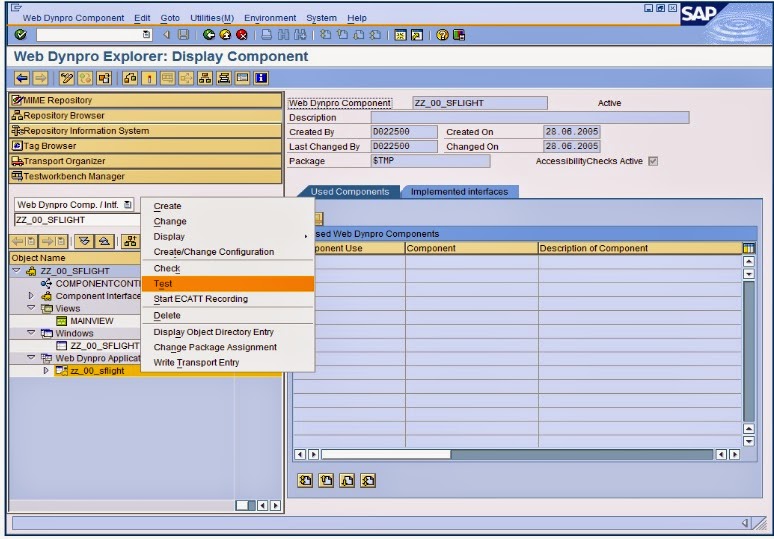
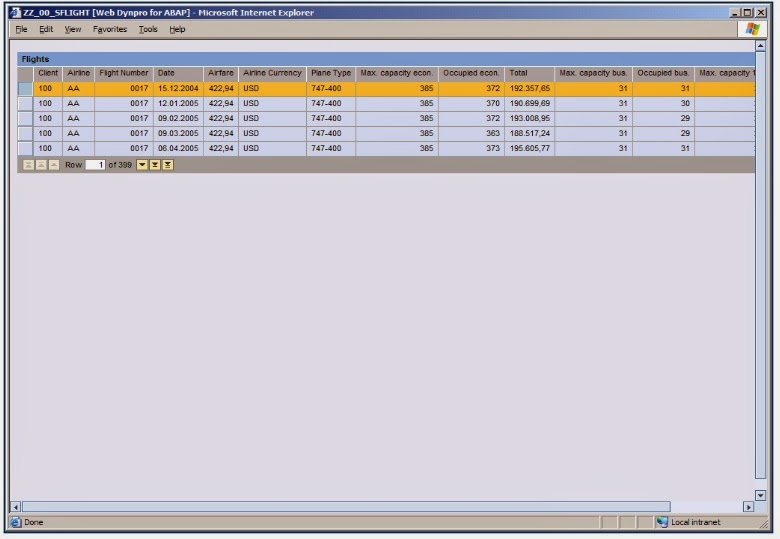
A browser will be started to run the WebDypro application. Log on using the same
credentials as before.The result page should look like this: